HTTP Trigger
A tiny configurable HTTP remote. Define screen layouts in a text file on the SD card, reboot, and start tapping. Use it to control smart-home gear, fire Pushover / Discord / IFTTT webhooks, glance at a Bitcoin or GitHub stat, scrub the volume on a Sonos — any service with a REST endpoint.
Works with
- Home Assistant — call any service (
POST /api/services/...), read any state (GET /api/states/sensor.x); long-lived access token in a single Bearer header that cascades to every screen. - Shelly (Gen 1 / Gen 2 RPC) — bare HTTP, no auth needed on the LAN.
- Tasmota / ESPHome — same.
- Philips Hue Bridge —
PUT /api/{user}/groups/X/actionwith brightness / colour JSON. - Bond Bridge — blinds / fans via
PUT /v2/devices/.../actions/Openwith aBOND-Tokenheader. - node-sonos-http-api — GET URLs for transport + volume.
- Tado / Ecobee / Nest cloud APIs, Pushover / ntfy.sh notifications, CoinGecko / GitHub / Hacker News for read-only displays, IFTTT / Zapier / n8n / Node-RED webhooks for everything else.
If the device or service has an HTTP endpoint, you can wire a button to it.
Four widget types — button, toggle, slider, display — that can be combined in any order. Button screens stack 1–3 pills; display screens show 1–3 polled values. Sliders substitute {value} into the URL / body / headers. Toggles can optionally poll a status endpoint and reflect the real server state.
Controls
- PWR short — next screen · BOOT short — previous screen
- Swipe left / right — also navigates
- Touch tap — fires the widget
- Slider drag — vertical; sends 1 s after release so you can correct
setup.txt keys
SSID/PASSWORD— WiFi (plus optionalSSID2/3+PASSWORD2/3)BRIGHTNESS(1–255, default 180)TIMEOUT(idle seconds → auto-off, 0 = never)INFO_REFRESH_M(default 15) — minutes between background polls of display values + toggle/button status URLsHTTPS_INSECURE— default off. HTTPS endpoints are verified against the embedded Mozilla root-CA bundle (works for every public-CA cert: Home Assistant Cloud, Tado, CoinGecko, GitHub, Pushover, …). Set totrueonly if your LAN endpoint presents a self-signed certificate.
http-trigger.txt — screen definitions
INI-style sections. WiFi stays in setup.txt; this file is purely the screens.
[screen]
type = button
label = Music
method = POST
[button]
label = Prev
url = http://192.168.1.70:5005/Kitchen/previous
[button]
label = Play
url = http://192.168.1.70:5005/Kitchen/playpause
[button]
label = Next
url = http://192.168.1.70:5005/Kitchen/next
[screen]
type = display
label = Bitcoin
[value]
label = EUR
url = https://api.coingecko.com/api/v3/simple/price?ids=bitcoin&vs_currencies=eur
json_path = bitcoin.eur
unit = EUR
decimals = 0
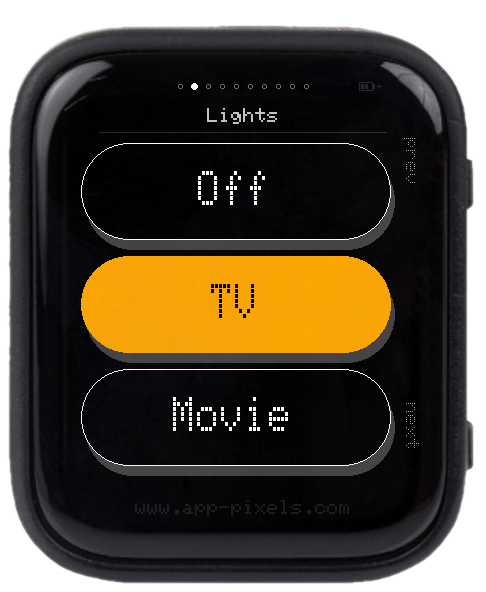
[screen]
type = toggle
label = Lamp
label_on = ON
label_off = OFF
method = POST
header = Authorization: Bearer YOUR_TOKEN
header2 = Content-Type: application/json
url_on = https://home.example.com/api/services/switch/turn_on
body_on = {"entity_id":"switch.lamp"}
url_off = https://home.example.com/api/services/switch/turn_off
body_off = {"entity_id":"switch.lamp"}
status_url = https://home.example.com/api/states/switch.lamp
status_json_path = state
Up to 16 screens. Each [screen] carries shared method / header / header2 / header3 that cascade into its [button] or [value] sub-sections. Toggle and slider keep all their fields on the screen line.
Download example config
Drop these two files onto the SD card under /setup/ and reboot:
- setup.txt — WiFi, brightness, refresh interval, optional HTTPS verification toggle.
- http-trigger.txt — ten example screens covering every widget type (smart-home buttons, toggle with status polling, slider, single + multi-value displays, Pushover notification, transit countdown).
Replace the placeholder URLs and tokens with your own; the rest of the structure should give you a working starting point.
Editing the config without ejecting the SD card
Plug the device into your computer over USB-C — the SD card mounts as a removable drive. Edit setup.txt / http-trigger.txt, save, reboot.